Burchfield Park, Holt, MI
October 2nd, 2014
At this point, the lower line, Bambi, has already been built. It was a simple build, just a series of flattened log pieces connected by short 2"x10" ramps, and one short section constructed with 2"x4"s. Godzilla is going to be much more advanced and a much more interesting build.
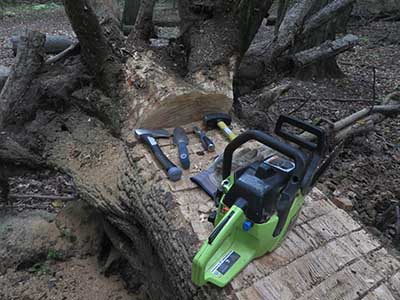
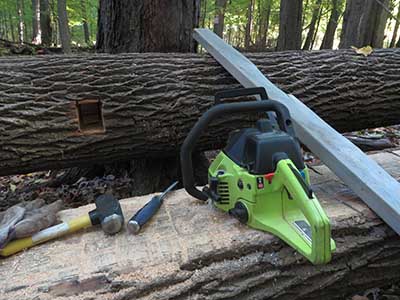
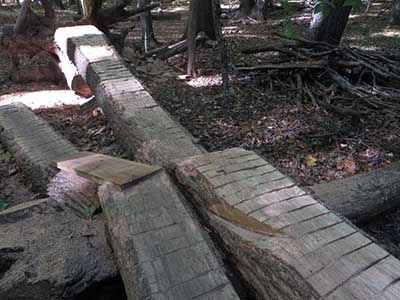
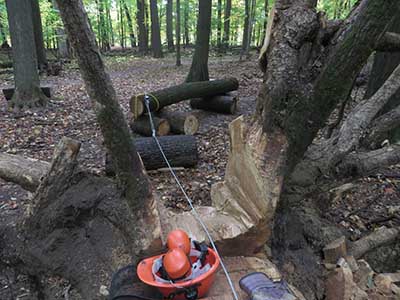
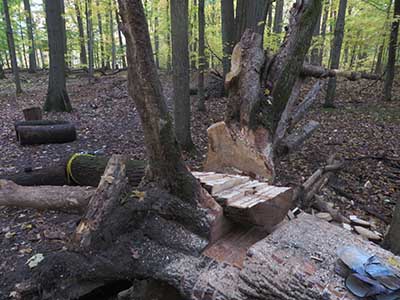
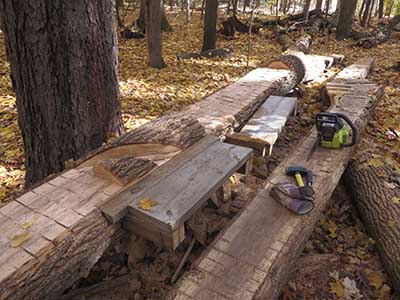
Beginning the process of flattening the first piece, the rootball. Use the chainsaw to make a series of approximately 2" wide pieces. I found that if the cuts are deep enough, and in this case they are, I could use my hatchet as a wedge. Putting the sharp edge of the hatchet into a cut and hitting the back of the hatchet head with my small (3 pound) sledgehammer breaks the pieces out more easily than using the sledgehammer to hit the pieces on the side.
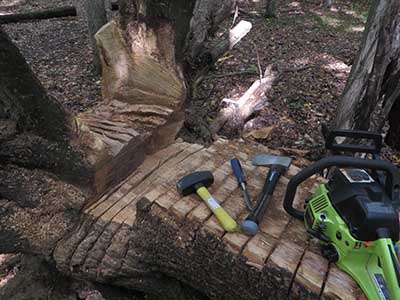
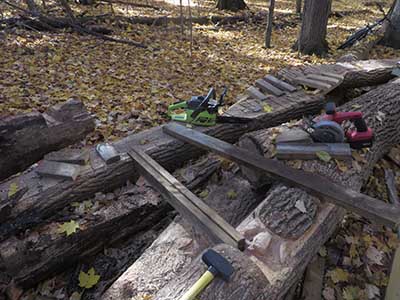
Tools for flattening include the chainsaw, a hatchet, a small sledgehammer, and a chisel. In addition, since I'm going to be cutting through the rootball, which is covered in dirt, I brought along a garden trowel to dig out as much dirt as possible.
October 7th, 2014
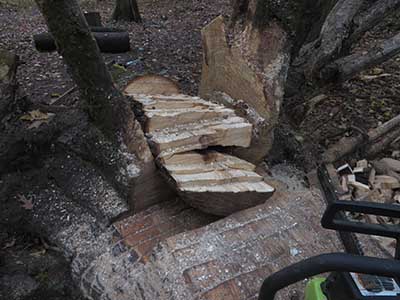
Cutting a path through the rootball was awkward, due to being unable to remove all of the dirt and having the chain dull quickly. In addition to the garden trowel, I found that using the hatchet to remove dirt, and even to cut away dirty wood, was helpful.
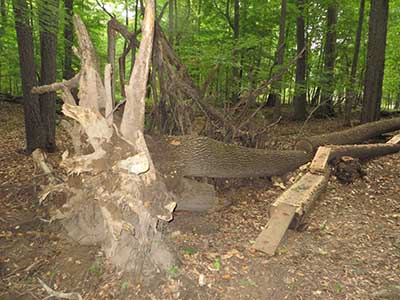
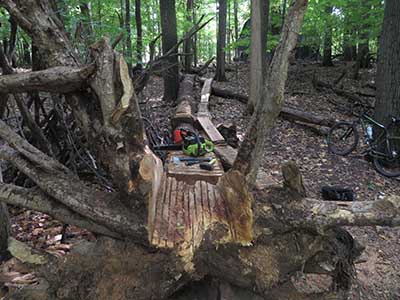
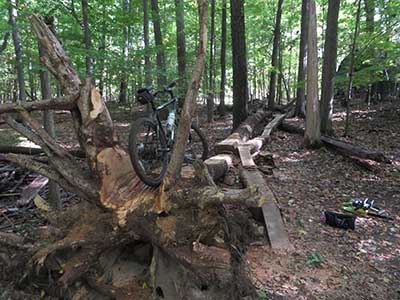
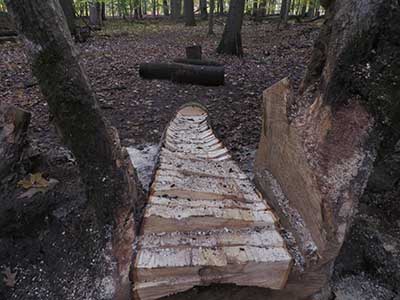
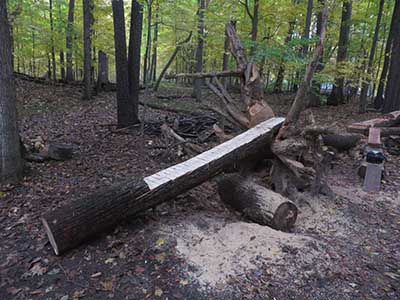
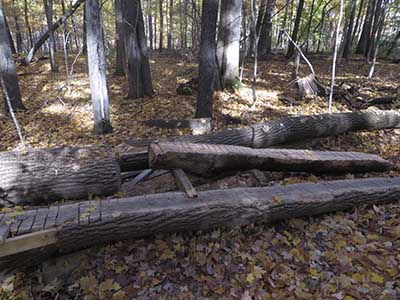
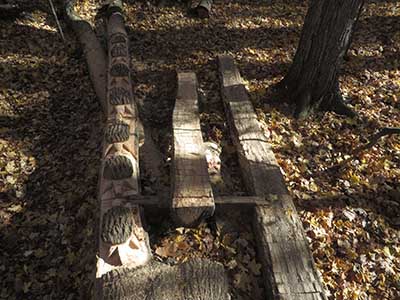
The view down the line, as the rider would see it coming up the entry ramp. I wanted to leave the roots sticking up into the air to give riders something to grab onto if they need an assist at the top. A certain amount of speed will be needed to get to the top of the entry ramp.
October 10th, 2014
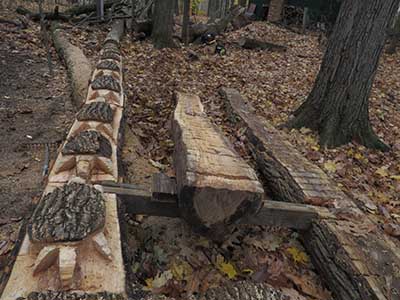
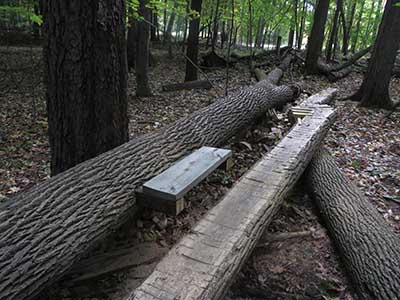
To allow riders to transition down from Godzilla onto Bambi, I created a shelf, using gangplanks on Godzilla. Holes for the gangplanks were cut into the log using the chainsaw. Two pieces of 2"x4" were inserted into the hole, side by side.
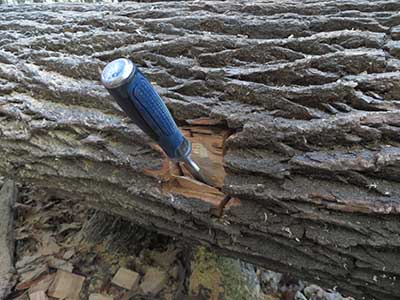
Removing material from the hole is awkward, but I use the chisel as well as sticking the chainsaw in and poking it around to clear material. Note that poking the tip is NOT recommended normally, because of kickback, but if the hole is deep enough, the blade will not come out of the hole, even if it does kick.
October 12th, 2014
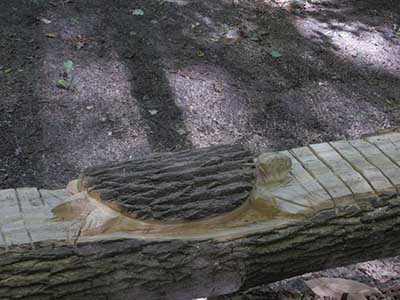
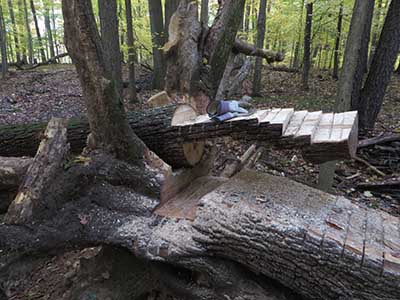
I had an idea for adding a unique feature to the deck in the middle of Godzilla, and it turned out pretty well. I had first intended to remove the bark and carve a turtle-shell design for the turtle's back, but looking at the bark, it seemed to be perfect just to leave it. Test-rides showed that the tail is rollable - if you miss it, though, you have to lift the front tire onto the turtle's back, which can cause balance problems.
I cut a guiding channel to indicate where the front wheel should go in order to cross the shelf and drop down onto Bambi. I wasn't sure it was going to work, but a test-ride was successful, so I'm keeping it.
After deciding I needed a safer way to repeatedly test the turtle and shelf, I added a notch to allow using Bambi's entrance to get up onto Godzilla. This would also fit with my plan to allow riders to go back and forth between Bambi and Godzilla at various points, creating lines of differing difficulties.

October 13th, 2014
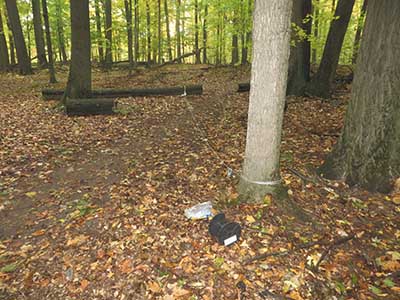
Using my hand winch (cable winch puller, a.k.a. a "come-along"), I started moving this heavy log toward Godzilla, hoping to be able to get it up onto the rootball. Rather than shape it on the ground, which would reduce the weight, I decided to put the unshaped log onto the rootball, in case I could not control the rotation once it was up top.
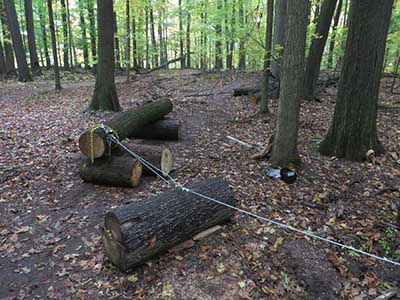
As I pulled, the dirt and leaves under the log started making it rise up, so I took advantage of that and started using some boards as ramps to get it up on top of some shorter pieces of this same log.
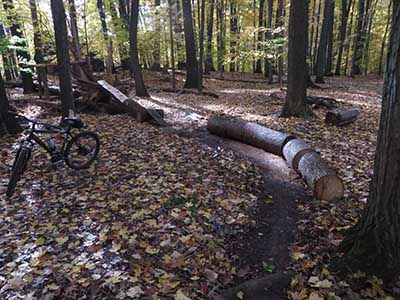
Using the smaller pieces as rollers allowed me to pull the log more easily down the trail. At one point, I was even able to push it by hand for a few feet. Considering that the hand winch requires a lot of winching to move something a short distance, and that you have to reconnect every few feet, this was welcome.
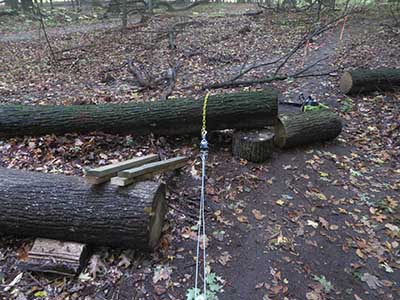
Once I got close enough to Godzilla, I was able to use the deck of Godzilla itself to attach the cable, and therefore get it pulling in exactly the correct direction. Sometimes there aren't trees available close enough or in the necessary direction.
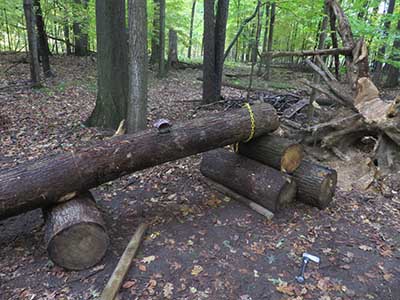
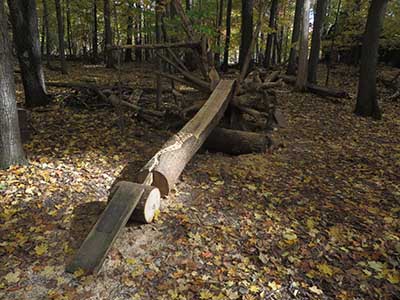
By positioning a single roller underneath the center of the log (you can see the cut I made in the bark to indicate the center), I was able to balance the log and then push one end down like a teeter-totter, thus allowing me to pull it into a stack of rollers. This would have been a LOT easier with another person helping.
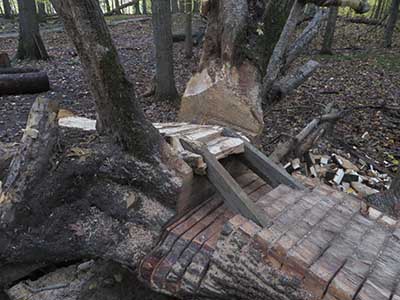
Pulling the log onto the rootball didn't go smoothly, the top roller kept moving forward with the log as I used the cable winch. I had expected it to stay in position while the log slid along on top of it! I had to keep kicking it back into position, and at a certain point this failed, but I was able to get the log up onto the rootball anyway. As you can see in the picture, the top roller fell into the hole left by the uprooting.
October 16th, 2014
Shaping the end of the entry log so that it would fit into the notch I had cut into the rootball. While it looks very rough and imprecise, all I needed it to do was to drop into the notch so that the entry log couldn't slide down and off the rootball.
Winching it into position, it looks good! Now I just need to shape the upper part of the entry log to create a rideable deck.
Oh-oh! I messed this up and now I no longer had an interlocking fit between the entry log and the rootball. Time for a different approach. Good thing that the entry log didn't slip down off of the rootball.
First, I decided to flatten the entry log and create a riding deck, at least for the upper part of it. I still need to think of a good entrance onto this log. Godzilla is positioned on a downslope and a rider could build up speed to hit it. It needs to be difficult, though, because of the difficulty and height of the rest of the line.
October 19th, 2014
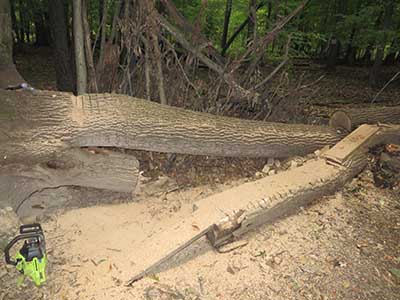
I moved the trail a bit to the right and added a slightly bermed corner (with logs placed to indicate the turn), so that we can maintain a bit of speed to hit the ramp. The entry needed to be intimidating so that riders don't get up on the stunt easily and get into trouble further along with Godzilla's advanced features. A small amount of front-wheel air is required to land on the entry log.
The entry log is not flattened all the way, to add some character and visual intimidation. You should land your front tire just past the gap, there is no need to try to ride the on-edge 2"x4"! You better have a bit of speed and be in an easy gear - the entry log is an uphill ride once you're on it, and you better know how to get off of it gracefully if you don't make it to the top! If you make it that far, the roots sticking up in the air at the very top can be grabbed.
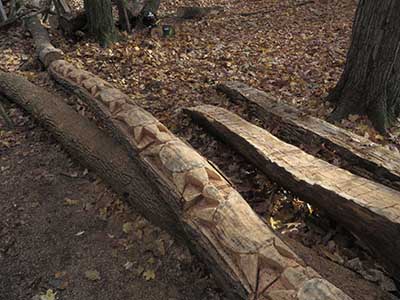
I did a bit of carving here to add some Godzilla "flavor" - a scaled tail. Hopefully riders will find this entry confusing enough, on first sight, to NOT ride it, but to get off their bikes and walk the whole stunt to see what they will be required to do to complete it. This is, for Michigan at least, a very advanced stunt.
October 23rd, 2014
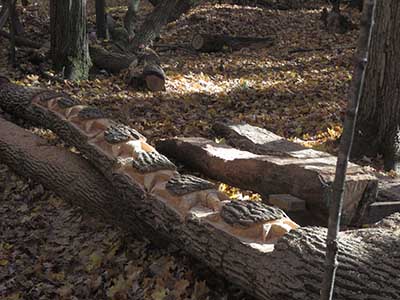
I added a second shelf, allowing riders to stay up on Godzilla, by traversing both shelves. Note the small gap between the two shelves, requiring a small front tire lift. This makes the left two exits available. I believe it is possible to cross up to Godzilla from the Bambi line using the new shelf and a bigger front tire lift, however, I didn't make it in a couple of tries.
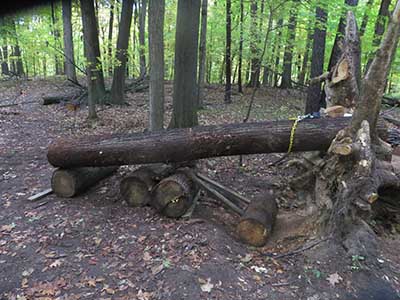
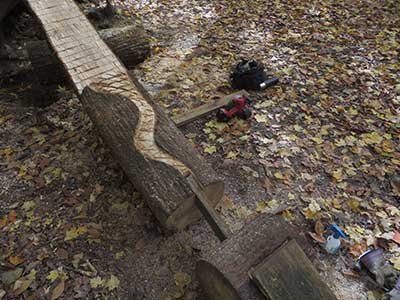
The middle exit is gapped from the right fork on the Godzilla tree, and raised, requiring front tire lift. The two 2"x4"s shown together below are the crossbar that the middle exit sits on, to give it its height. It is sunken into the Bambi exit and the uncompleted Godzilla left exit. The middle exit log is on the left in this picture, upside-down, you can see the notch that will sit on the two 2"x4"s.
This is the completed middle exit, entered from the right fork of the Godzilla line. As you can see, it is gapped and raised from the Godzilla line, requiring front tire lift. The log has been rounded to prevent pinch flats. Small pieces of 2"x4" were nailed in afterwards, to prevent the middle exit log from moving in place. Test rides were solid even before those pieces were added.
October 26th, 2014
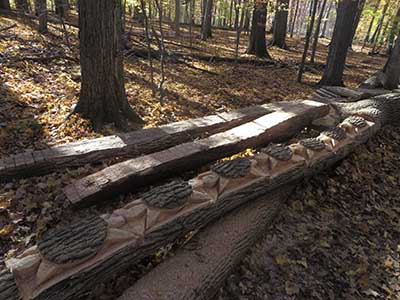
Today's work was all about TURTLES! On the final, leftmost, exit of the Godzilla line, I just added more turtles. There are a few more left to be carved.
This exit will probably ride like a rock garden, but up in the air. I expect it's going to be very difficult, but I won't know until I test-ride it.
I don't think I'll need to even make an exit ramp on this all-turtle line, it's low enough at the very end that we should be able to just drop off to the right.
October 29th, 2014
A few more turtles needed to be carved today to complete the final exit line. I noticed that the bark had come off of some of the existing turtle "shells" - I wonder if somebody had been walking on them? I doubt anybody tried to ride it, but I suppose it is possible. The recent rain may have softened up the shells and loosened them. I carved another four today, ending up with 11 turtles in the "turtle conga line". Below - with shells.
Sitting on my bike and tip-toeing it over the turtles as a test, one of the shells broke off under my wheel! Apparently, it wasn't going to be safe to ride like this, so I removed the shells completely. This left behind a dark layer of soil-like crud and a bunch of bug tunnels. Below - dark crud and bug tunnels.
I used the chainsaw to remove this layer, which also ended up giving the bare shells some texture that will give our tires some grip. Below - with crud and bug tunnels removed.
I also finished clearing the final fall zones for Godzilla today, and so now all lines are open completely. We are doing a group stunt ride/video shoot on Sunday, November 2nd, at 10:00 am. Meet at the Riverbend lot.